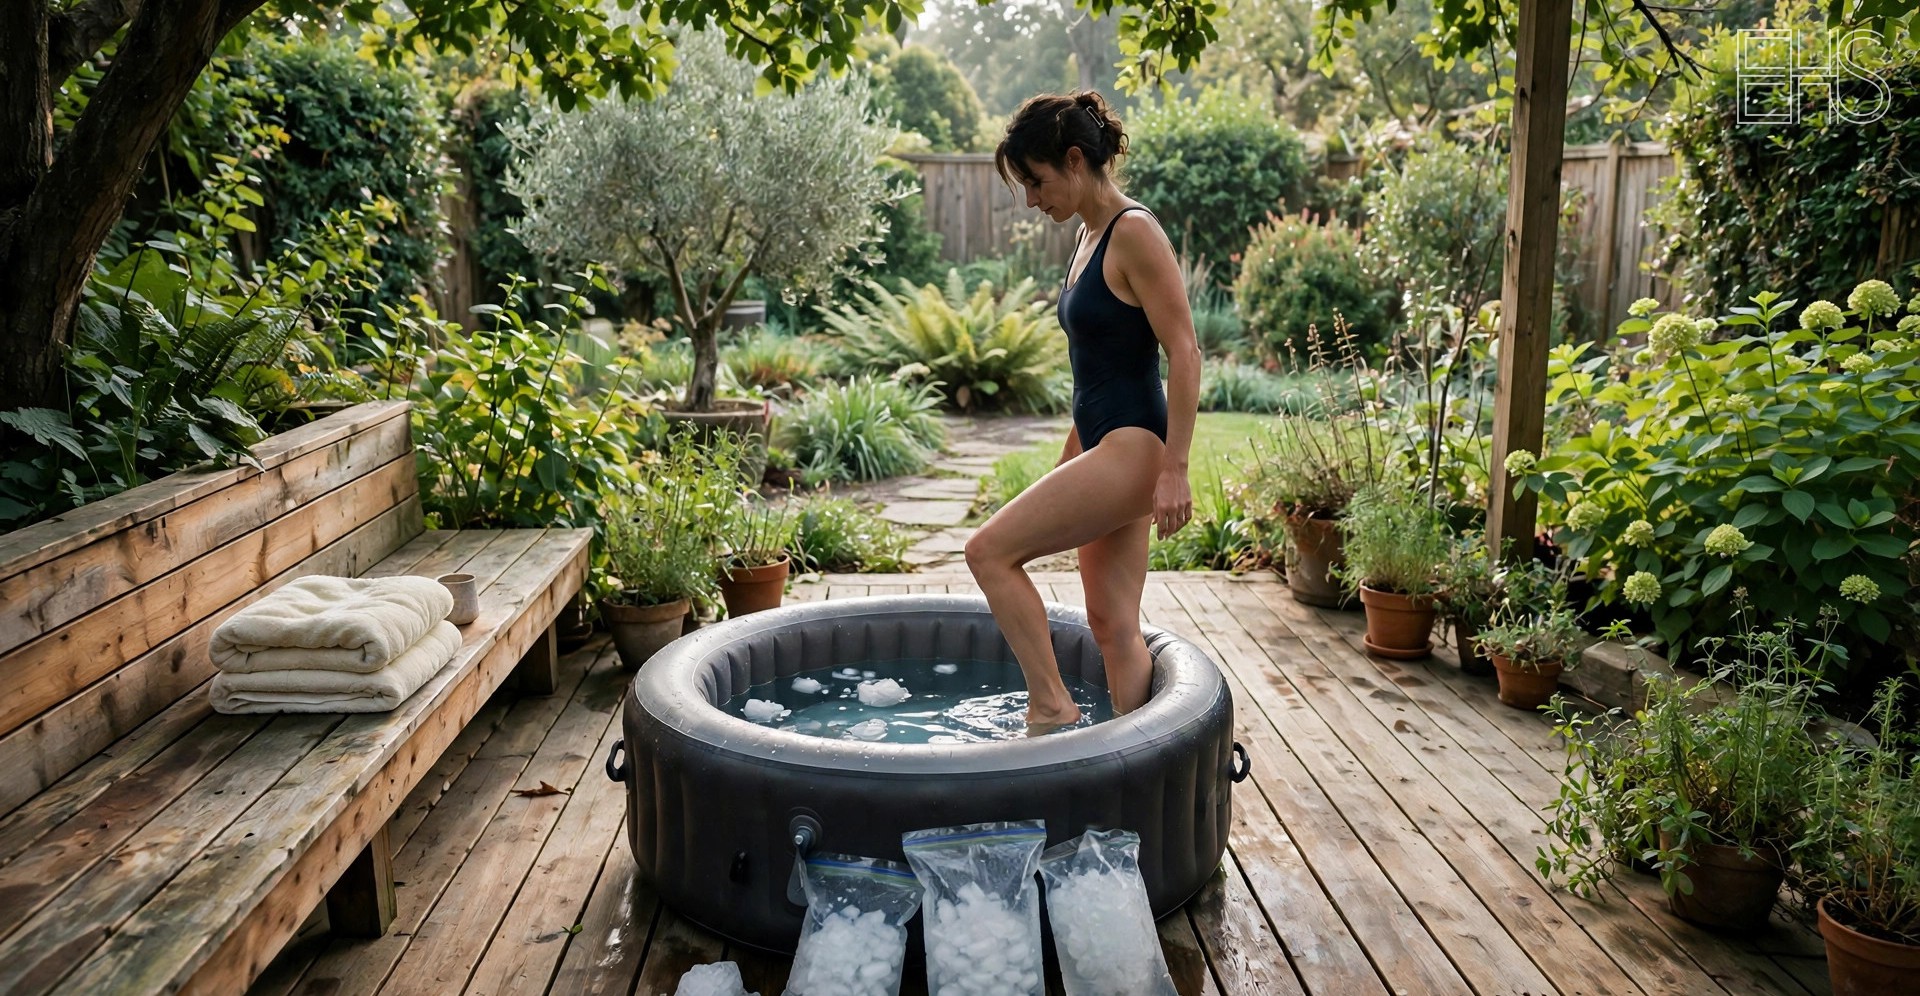
A cold plunge tub does not have to be a permanent fixture. For renters, movers, and the plunge-curious, an inflatable arrives in a box, inflates in an afternoon, and disappears into a closet when the experiment ends. The question is not whether inflatables work. It is whether their tradeoffs (thinner insulation, ice logistics, a shorter working life) fit how you plan to plunge.
One note before the details: cold immersion is not for everyone. Start gradually, keep early sessions brief, and sit out on days you feel unwell.
Key takeaways - Inflatable tubs are the lowest-commitment entry into cold plunging: packable, affordable, and ready in under an hour. - Drop-stitch PVC is the construction to look for; it holds shape far better than thin laminated vinyl. - Most inflatables are ice-cooled, which keeps the system simple but preserves the ice-buying routine; a few accept chillers with the right ports. - Thinner insulation means faster temperature drift, so shade and a proper insulated cover matter more than with rigid tubs. - Buy an inflatable to learn whether you plunge regularly before spending thousands on a permanent setup.
What an Inflatable Tub Actually Is
The serious end of the market uses drop-stitch construction, borrowed from rigid inflatable paddleboards. Thousands of fine threads join the inner and outer PVC layers, so inflated walls hold a flat, board-like shape instead of ballooning. The result stands on its own and tolerates bumps without folding. Cheaper inflatables use single-layer laminated PVC: fine for a beach toy, less reassuring under a hundred gallons of water.
Sizes cluster around a seated one-person format, roughly 32 to 40 inches wide and 26 to 30 inches tall, holding 70 to 120 gallons. A few larger oval models stretch past 50 inches for taller users. Almost all ship with a pump, carry bag, ground mat, and basic cover; the better ones add a patch kit and drain hose adapter. Most inflatables are typically listed from around $100 to $400, with premium drop-stitch models that include chiller ports listed higher, sometimes approaching $800. As always, verify current rates before buying, since pricing moves with promotions and seasons.
The Honest Case For Inflatables
The entry cost is low. A quality drop-stitch tub costs less than a month of many boutique wellness memberships. Unsure whether daily cold exposure becomes a lasting practice? That price is a cheap experiment next to a $2,000-plus rigid tub and chiller.
The setup is trivial. Unfold, inflate, fill: most owners go from box to water in under an hour. No electrician, no delivery crew, no reinforcing a deck for two thousand pounds of static load.
Portability is the whole point. An inflatable packs into a duffel-sized bag. Renters take it to the next apartment; homeowners move it from patio to garage with the seasons.
The exit is clean. If the habit does not stick, deflate it and store it. A rigid tub becomes furniture you must sell or live with; an inflatable becomes a bag in the closet. Our guide to choosing a cold plunge frames this as the commitment question.
The Tradeoffs, Stated Plainly
Insulation is modest. Drop-stitch walls are an inch or two of air-filled PVC, which insulates far less than foam-filled rotomolded walls or a foam-backed acrylic shell. The water warms faster between sessions, especially in sun or warm garages, so ice top-ups come more often than for a rigid-tub owner. Shade and a genuinely insulated cover narrow the gap but do not close it.
Durability is measured in seasons, not decades. PVC resists water beautifully but not sharp objects: pet claws, gravel under the mat, a dropped weight plate. UV degrades the material over years, and the valves and seams are the usual failure points. A patch kit handles small punctures, but an inflatable is a consumable in a way that a rotomolded tub is not.
Cooling is usually ice. Most inflatables are designed around ice: fill, add bags, plunge. That is simple and needs no electricity, but it preserves the weekly ice logistics a chiller eliminates. A few models include hose ports for an external chiller, which changes the ownership equation, though thin insulation means the chiller cycles more than on a rigid tub. Our ice versus chiller comparison covers the running-cost math.
The look is functional. No one buys an inflatable for its beauty. In a designed bathroom or a landscaped patio, a PVC tub reads as equipment. If the plunge sits where guests see it and that matters, budget for a rigid tub instead.
Inflatable vs. the Alternatives
The table below compares the inflatable against the other common ways to get cold water at home, using typical listed prices and manufacturer specifications. It is a starting orientation, not a substitute for checking current models.
| Option | Typical tub cost | Portability | Insulation | Working life | Cooling |
|---|---|---|---|---|---|
| Inflatable (drop-stitch) | From around $100 to $400 | Packs into a bag | Modest; drifts faster | Seasons to a few years | Ice; some chiller-ready |
| Stock tank | From around $100 to $200 | Heavy but movable | Poor; bare metal | Many years | Ice |
| Rotomolded plastic tub | From around $800 to $1,500 | Movable with effort | Very good; foam-filled | A decade or more | Ice or chiller |
| Acrylic tub | From around $2,000 | Permanent | Good with foam backing | A decade or more | Usually chiller |
The inflatable wins on portability and exit cost and loses on insulation and lifespan. Its real distinction is reversibility: the only tub you can fully undo.
What to Look For When Buying
The inflatable market ranges from thoughtful to flimsy, and listings rarely make the difference obvious. Check each specification below against the spec sheet, not the marketing copy. The table lists the specifications that matter, with what a good answer looks like, drawn from common manufacturer specifications.
| Specification | What good looks like | Why it matters |
|---|---|---|
| Wall construction | Drop-stitch PVC, double-wall | Holds shape under water pressure; resists deformation |
| Wall thickness | 8 cm (about 3 inches) or more | Thicker walls insulate better and puncture less easily |
| Capacity | 80 gallons or more for seated adults | Too small means knees above water, which defeats the purpose |
| Chiller ports | Standard hose fittings or included adapters | Keeps the upgrade path open if you outgrow ice |
| Cover | Insulated, latching | The cover is the main heat path; thin covers waste ice |
| Drain | Bottom or low-side drain with hose adapter | Draining 90 gallons without one is miserable |
| Warranty | 1 year or more, patch kit included | Signals the manufacturer expects the seams to hold |
| Ground protection | Dedicated mat or footprint | Gravel and concrete abrade the base over time |
Two warnings: listings with only lifestyle photos and no spec table are usually hiding thin construction, and "chiller-ready" without a stated port size usually means a DIY workaround rather than a real connection.
Setup, Placement, and the Ice Routine
Placement decides half the ownership experience. Put the tub where the ground is level and protected: a patio slab, a garage floor, or packed earth with the ground mat underneath. Ninety gallons of water weighs over 750 pounds, so confirm the surface and, for decks or balconies, the structure. Shade is worth real money in ice savings: a tub in afternoon sun can need twice the ice of the same tub in shade.
Filling is straightforward with a garden hose; draining is the chore. A low drain port with a hose adapter lets gravity do the work. Without one, you are siphoning or scooping. Plan the drain path before the first fill.
The ice routine is the recurring cost of the simple setup. Expect several bags of ice per session to reach the low 50s Fahrenheit from tap water, more in summer. Run the numbers honestly against a chiller's upfront cost if you plunge more than a few times a week. Our water care guide covers sanitizer and filtration options that stretch the interval between water changes, which matters when every change means another ice run.
For indoor placements, condensation deserves a mention. Cold water in a warm room sweats, and thin walls sweat more than insulated ones; a dehumidifier or good ventilation prevents damp plaster. Our indoor versus outdoor guide covers moisture management.
Who Should Skip the Inflatable
Inflatables are not for every household. Daily plungers who want set-and-forget temperature control will tire of the ice routine; a chiller-paired rigid tub is the honest answer. Tubs left filled through hard winters suffer seam damage as ice expands, while rigid tubs winterize far better. Homes with swimming dogs or kneading cats are a puncture risk no warranty covers.
The Upgrade Path
Think of an inflatable as a first chapter, not the whole book. Six months of regular plunging reveals your real temperature preference, session length, and whether the ice routine bothers you. That knowledge makes the eventual rigid-tub purchase far better informed.
Frequently Asked Questions
How long will an inflatable cold plunge tub actually last?
With regular use and basic care, a quality drop-stitch tub typically serves two to four seasons. The seams and valves fail before the PVC does, and UV gradually weakens the material, so shaded placement extends the working life noticeably. Thin single-layer vinyl models often last a single season of frequent use.
Will an inflatable keep water cold between sessions?
For hours, yes; for days, only with help. The thin walls let heat in faster than an insulated rigid tub, so water at plunging temperature in the morning will have drifted upward by the next day. An insulated cover slows the drift substantially, and shade placement helps further. Most owners add a top-up of ice before each session rather than trying to hold temperature around the clock.
What happens if the tub punctures?
Small punctures are a ten-minute fix: dry the area, apply the patch from the included repair kit, and wait for the adhesive to cure. Seam failures and valve leaks are harder and often end the tub's useful life, which is why warranty length and the included patch kit are buying criteria rather than afterthoughts. Keeping the ground mat in place and the area clear of sharp objects prevents most punctures.
Can an inflatable live outside through winter?
It can survive a mild winter drained, deflated, and stored indoors, but leaving it filled through hard freezes invites seam damage as ice expands. Rigid tubs winterize far better. If your winters are severe and you want year-round outdoor plunging, start with a rigid tub rather than nursing an inflatable through January.
How much ice does each session actually take?
It depends on starting water temperature, tub size, and air temperature, but a common pattern is three to five 10-pound bags to bring 80 to 100 gallons of tap water into the low 50s Fahrenheit. Summer heat and sun push that higher. The bags are the recurring cost behind the ice-versus-chiller math: at several sessions a week, a chiller often pays for itself within a year or two of store-bought ice.
What should go under an inflatable tub?
A flat, clean, protected surface: the ground mat that ships with most tubs, laid over a patio slab, garage floor, or level packed earth. The mat protects against abrasion, since grit grinding between the PVC base and concrete shortens the tub's life. Avoid gravel or mulch without the mat. For upper-floor decks or balconies, confirm the structure's load rating first: a filled tub concentrates over 750 pounds in a small footprint.
This article is for informational purposes only and does not provide medical advice or guaranteed outcomes.